Go fly a kite? Naw, here’s how to make a kite from a recycled plastic bag.
This past weekend I rediscovered the fine art of DIY kite flying. A friend of mine had the brilliant idea to launch a ‘Kite Flying Party’ to celebrate nothing in particular, except recycled materials and wind. I must admit that getting together with a group of friends to stare into the clouds was the most fun I’ve ever had with a recycled garbage bag and a spool of fishing wire.

I am so inspired with kites given the low cost and endless fun involved, that I’ve decided to share one of Carl’s winning kite designs with you. A recycled garbage bag is not the prettiest kite in the sky, but it flew the highest and longest for the least amount of money. At the party everyone wanted to know how to make a kite like Carl. So here’s how to design a kite using my How to design a kite pattern. This is an easy and super fun project for both adults and kids.

How to Make a Kite Materials:
- 2 wooden dowels, 90cm (35″) and 120cm (47″) long. The longer dowel is the spine of the kite, the shorter dowel the crosspiece.
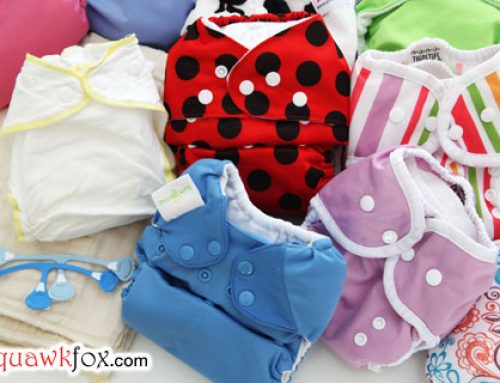
- Plastic sheeting or recycled garbage bags
- Strong tape, such as packing tape or electrical tape
- Twine
- Kite string or fishing line
Kite Tools:
- Tape measure
- Scissors
- Pencil
How do you make a kite step by step?
This Do-it-Yourself project takes 10-steps and one hour to complete. Get creative by decorating your kite design using paints, markers, or stickers.
1. Download the Free Kite Design. Then get your ‘How to make a kite’ building materials together.

2. Measure and locate the middle point on the crosspiece, mark with a pencil. Place the middle point of the crosspiece at right angles on the spine, about 30cm (12″) from one end.

3. Fasten the two dowels together using twine and tape. It is important that they remain at right angles to each other, and the mid point of the crosspiece is directly on the spine.
4. Run twine from one end of the crosspiece, to the top end of the spine, to the other end of the spine. Fasten at each end using tape. This will help keep the dowels properly at right angles to each other. Lay the frame flat, with the crosspiece facing up.

5. Cover the frame with plastic material. Use tape to secure to the dowels and the twine, with extra reinforcement at the ends.


6. Punch two small holes along the spine for the bridle. It’s a good idea to reinforce these holes with tape.
7. To make the bridle, feed a length of twine through the hole at the top and tie it to the spine. Do the same with the other end of the twine at the other hole. The bridle should be long enough so when you pick up the kite by it, it’s at least 20cm (8″) from the kite’s surface.
8. Attach the kite string to the bridle. By choosing where you attach the string, you control the angle at which the kite flies. This will require some experimenting to find the best spot, but start at a point near the top of the kite.
9. Attach a length of twine (about 120cm/4′) to the bottom end of the spine as a tail. Tie ribbons of left-over plastic at regular intervals to it.

10. Find some wind, go fly a kite!

How to Fly a Kite
If you’re having problems getting your kite off the ground or it’s spinning out of control, then try these ways to fix your kite.
Troubleshooting: Ways to Fix Your Kite
1. Failure to launch: If your kite flies flat or won’t lift off, try moving the point where the kite string attaches to the bridle towards the tail of the kite.
2. Spinning out of control If your kite spins or dives uncontrollably to one side then the next, move the bridle attachment point a bit towards the front of the kite, or add a few more ribbons to the tail.
3. Not enough wind: Try another day. 🙂

Kite flying parties are an amazing amount of frugal fun for all ages. I highly recommend finding an open field, throwing a kite design contest, or trying to engineer the best flying machine you can muster. Now go grab your friends, your kids, or your grandchildren and take them outside for a fun day of kite flying.
Love love love,
Kerry


I love you. That is all.
Think I will try this with my daughter, and you are right about it being frugal fun.
@Emily You crack me up girl. That is all. 😉
@Hollie Building a kite is super fun. Get your daughter to decorate her kite with stickers, markers, paint, or anything else crafty!
@Laurel Alanna McBrine You are correct! It’s Blue Nose in the background. The perspective in your painting is indeed very very close to where we launched our kites. The world just got smaller, neighbour! 😉
Hey – I recognize that mountain. I grew up on the hill opposite, on the other side of the valley!
You are flying kites VERY close to the house I lived in.
I have a quick oil sketch of Blue Nose in one of my painting blogs – scroll back to the beginning of the blog:
http://www.mcbrinepainting.blogspot.com
@kosmo Trees can be hazardous to kites, very very true. I would suggest finding a launching pad far away from trees and hydro polls too (for safety!). Using paper as kite making material sounds like a fabulous idea!
What about problem 4: a tree ate my kite. Charlie Brown ran into this a lot.
We made kites with newspaper instead of plastic when I was a kid. Seems like the plastic would probably work better, but our kites worked just fine.
You’re so creative!
@Patrice Dogs are awesome. 😀
I guess you need a dog there for moral support.
Did someone try to blow you off by telling you to “go fly a kite”? Hottie rockin the kite in photo #10. Nice job Foxy (can’t get used to calling you Kerry)
@Fup Naw, I told myself to go fly a kite. 😉 You can keep calling me Foxy. 😉
What a great tutorial!! I’ve included it on my website today along with some other kite tutorials. I’m sure this will be a hit!
Thanks for sharing!!
I love the idea of using recycled bags; I did the newspapers when I was a kid. I’m going to give my 7th graders a choice. Paper or plastic.
I am a teacher/summer camp instructor and I just made these with a group 1st-5th graders: they LOVED it. It was difficult for them (I had them work in partners), but a good lesson in perseverance because when it was all said and done, one of the kids shouted, “I want to make these every day for the rest of my life!”
Thanks for an awesome tutorial!
I’m a little confused as to how you put the plastic bag on… could you explain?
[…] You can find the instructions for this kite at Squawkfox. […]
I am doing this for a project…is there any possible way instead of plastic paper i could use it with just regular paper?
Did Pivo get his own kite?
Oh my goodness! I think I’m going to host a kite flying party for my birthday this summer. I haven’t flown a kite since summer vacations down the shore with my family as a kid. Geez!
How thick should the dowels be?
Kerry… My first memory was with my dad at the age of 2 years old flying a kite!!Now I fly kites with my son and just last weekend my dad and I flew kites again after all these years. im now flying my kites at night as well I add some light weight bicycle lights to my kites for night flight its soooooo much fun.This morning I test flew my biggest home made kite ever its 14ft wing span and 10 ft tall it did great its first time up!!!! was amazing.Im going to get kite flying in my area to be something lots and lots of people start doing.Weeeeeeeeeeeeeeeeeeeeeeeeeeeeeeeeeeeeeeeeeeeeeeeeeee!!!!
Pants look good to me, you’re a hottie! 😉 Anyway thanks for this, going to make me a kite today. They have some super strength Gorrilla glue trashbags I’ve been using and it’s hard to puncture them even with scissors so I’m going to try that but with a W-Frame kite
I have probably the only two boys who have no interest in flying kites. …. why me, i love kites. I torture them anyway ¿?
So what kind of material did you exactly use to cover it up?? would big trash bags work just as good? or is it the lighter the better kind of deal? if you could reply as soon as you can, thatd be great.
What are the exact vaules for the bridle-holes in the sail (between top corner and top hole and between bottom corner and bottom hole)?
I really love your friendly big-eared dog. So cute! :3 <3 This kite idea is really good! Also,can I have your dog? I wish it wasn't optional! 🙁
There are inexpensive guides on amazon called, “Building Free and Recycled Kites” and “Kite Repair.”
This was such a creative idea! We are doing it in class! What a great way to spend an afternoon